Monday, July 25, 2016

Lizzy House Meadow Quilt - custom longarm quilting

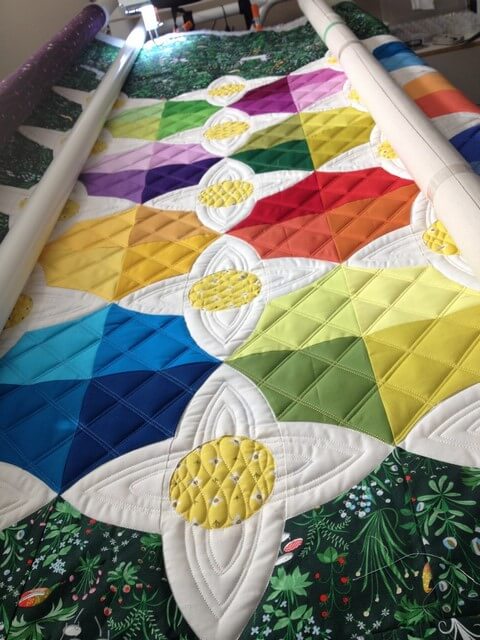
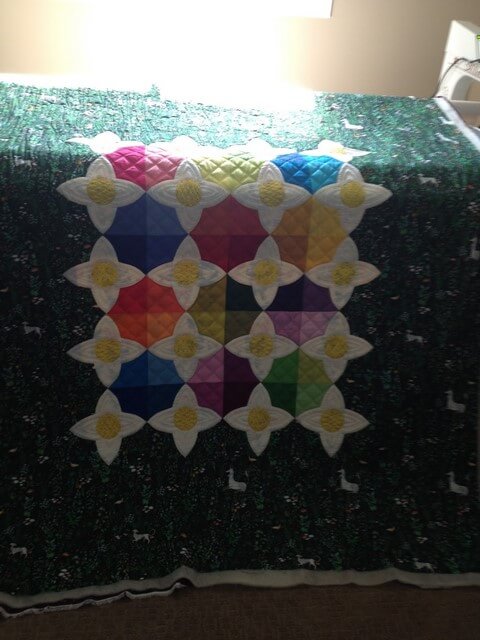
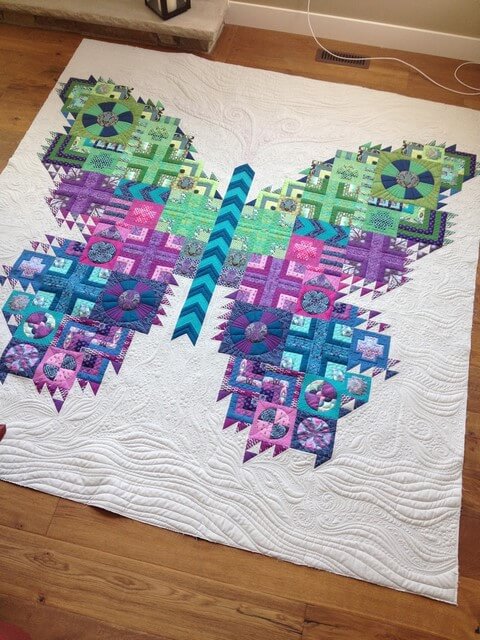
Erin completed this pretty amazing Meadow Quilt.  The pattern is by Lizzy House and you can only get the pattern if you take the class....Lizzy House was in town this year and the results of Erin's quilt are pretty awesome:

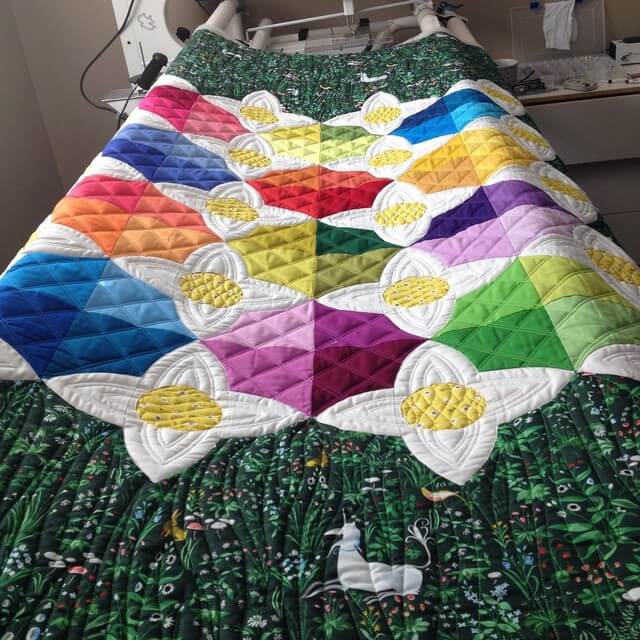
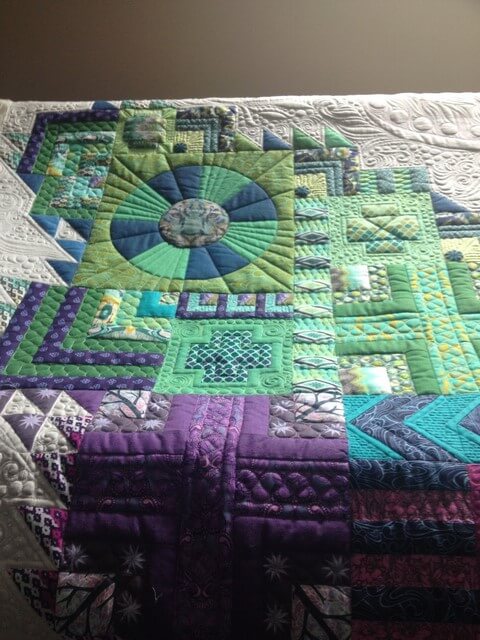
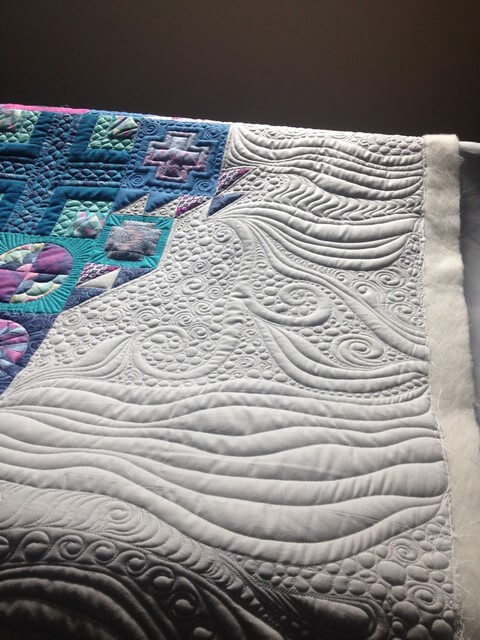
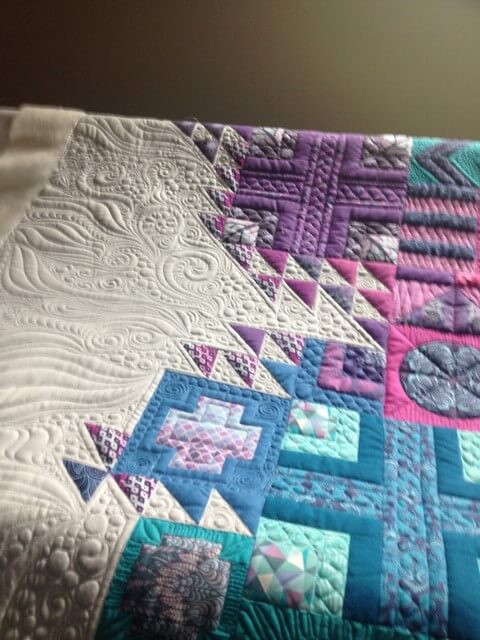
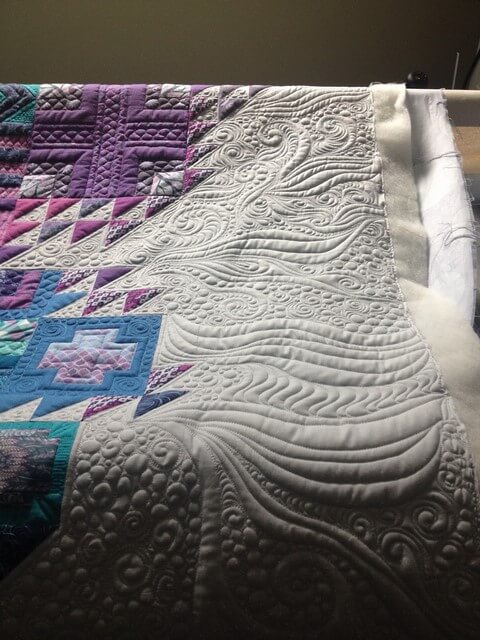
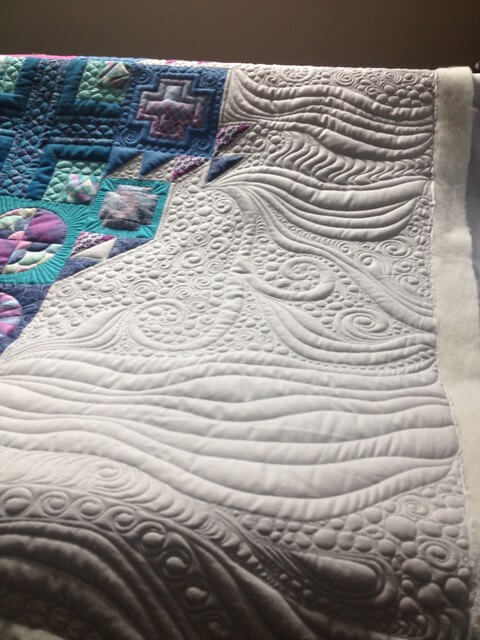
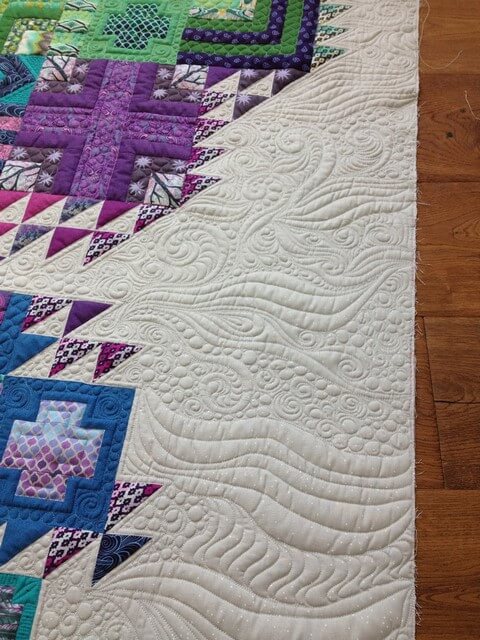
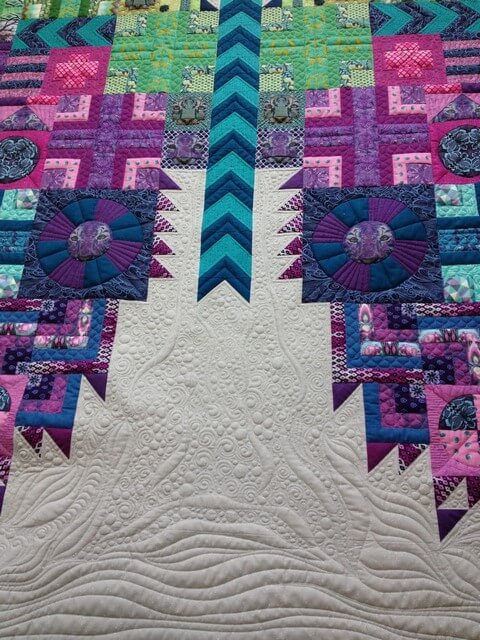
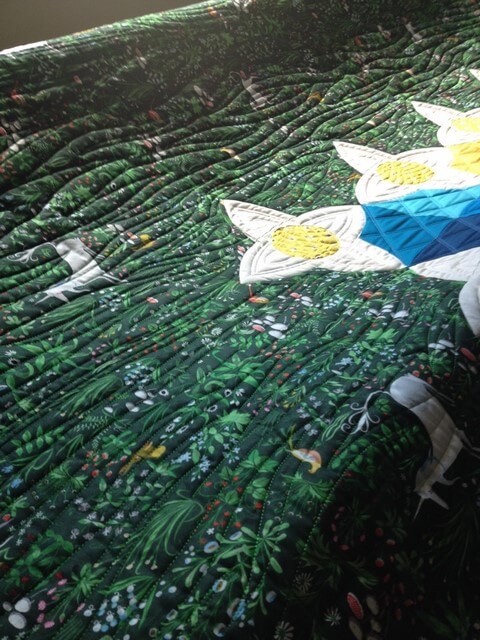
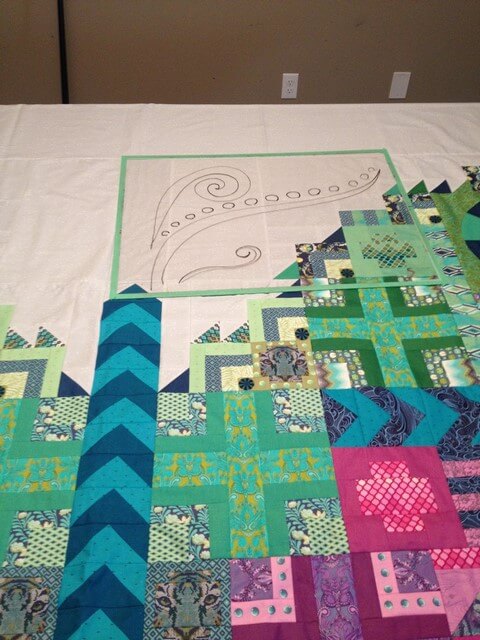
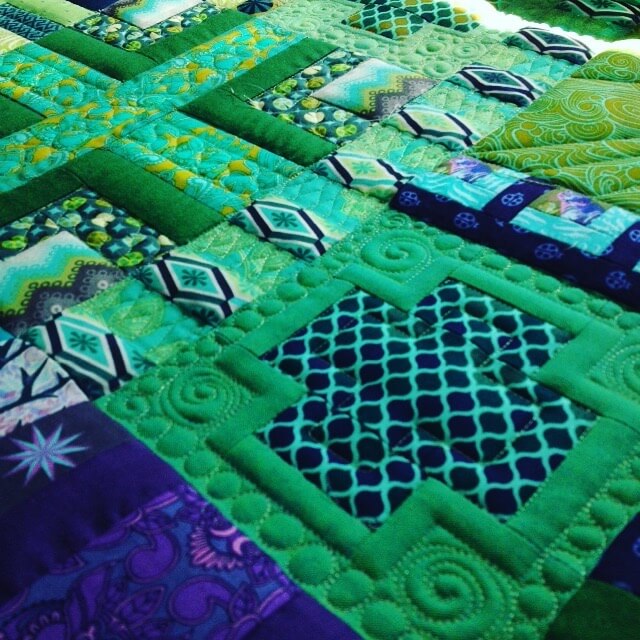
Erin knew a few elements she wanted on her quilt.  She loved the cross hatching and the quilting on the petals that she saw in a photo here: Mel's Quilt.    She wanted something different done in the centre yellow circles as well as the background.   As soon as I saw the background fabric and the theme of the fabric, I thought 'grassy lines'!   The centre yellow circles, I had a few ideas and auditioned them on paper first...
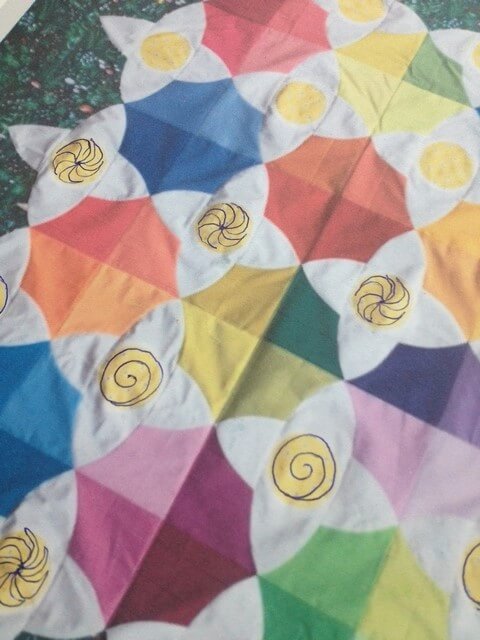
 and then had another idea so tried it directly on the quilt top using my plexiglass:  
 
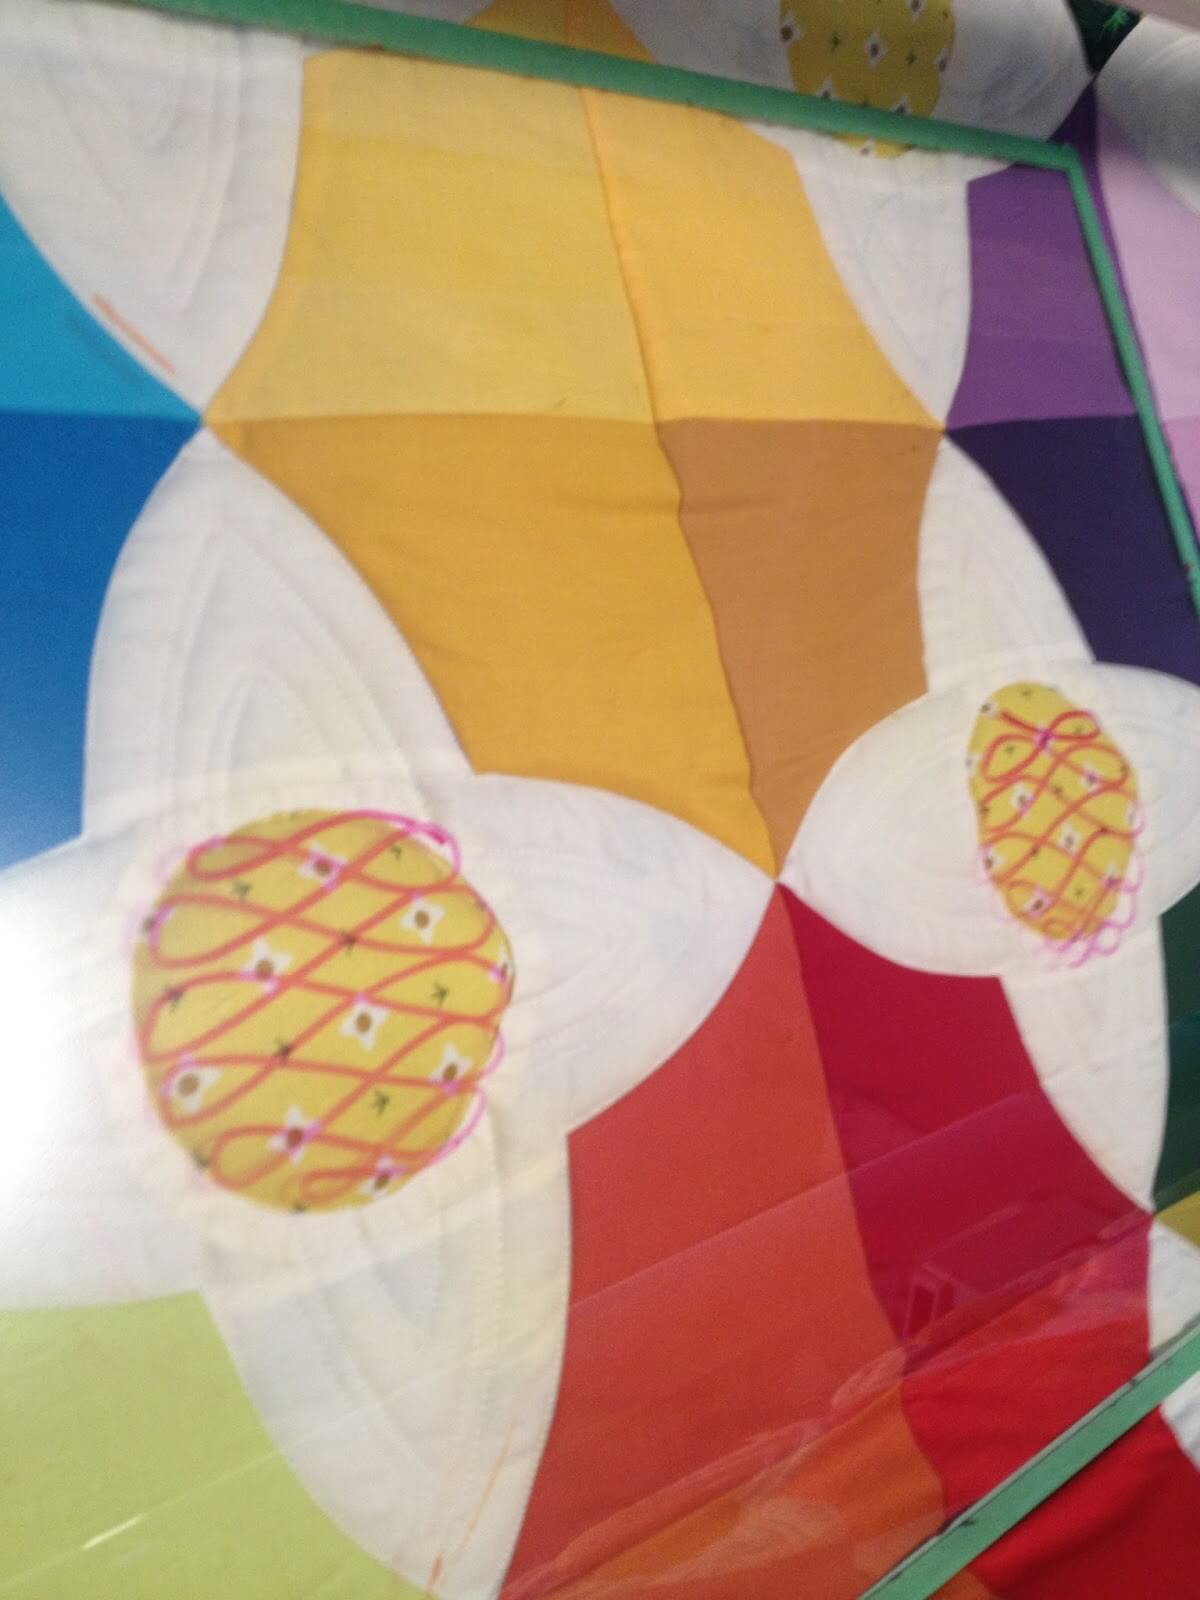
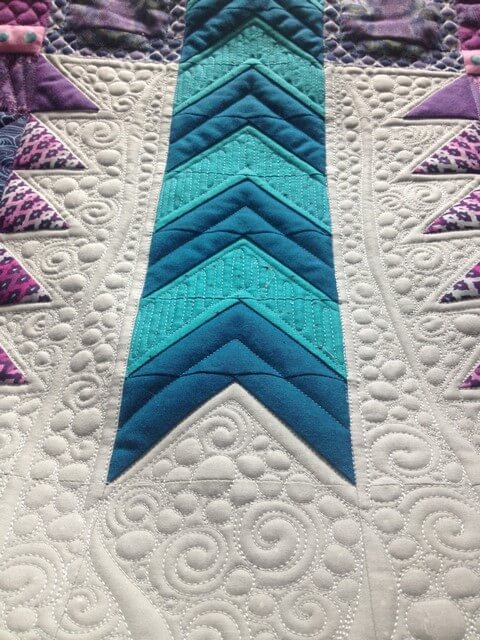
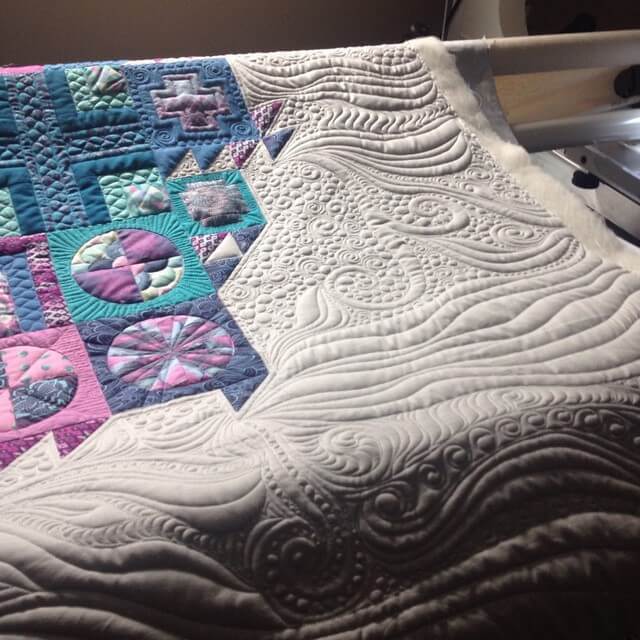
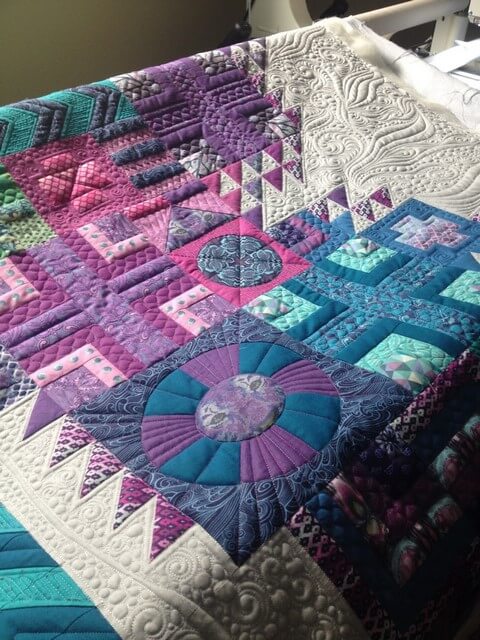
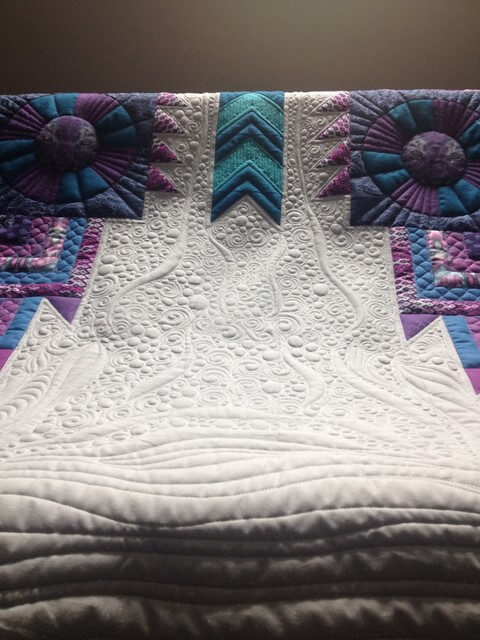
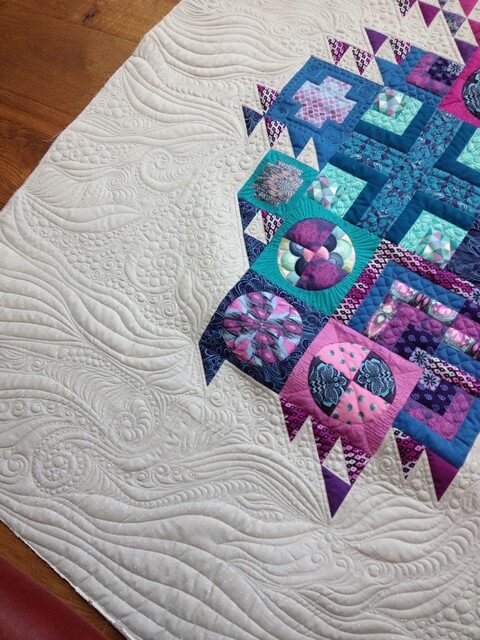
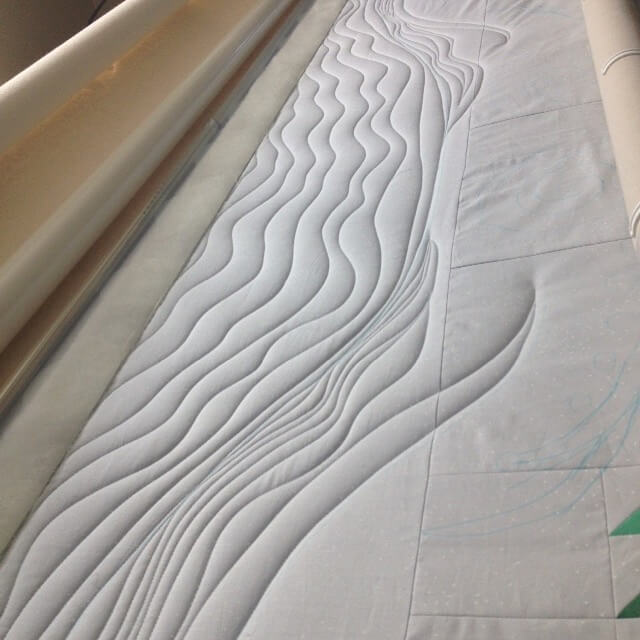
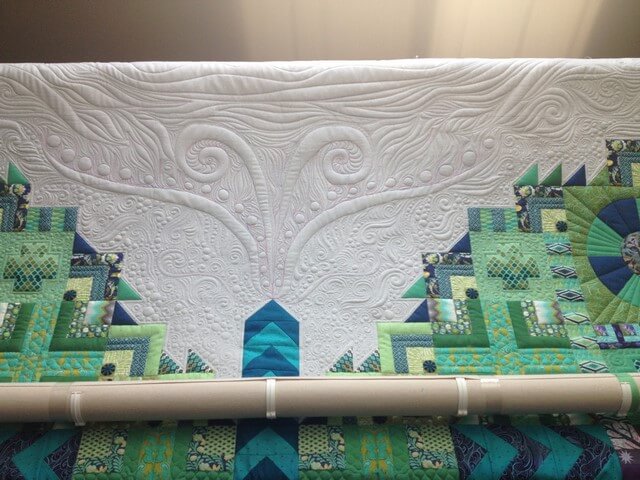
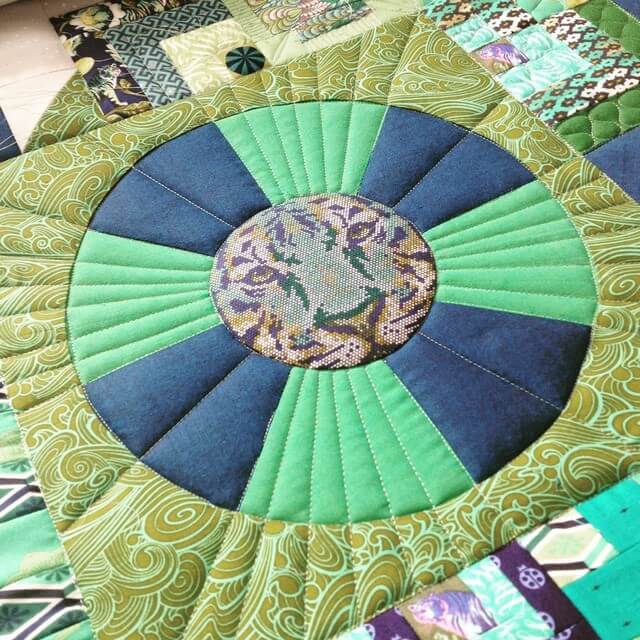
 I quilted the grass as I advanced the quilt...once I got to the flowers, I went through and did all of the petals first.   I used my curved rulers to stitch in the ditch around each flower and echo lines. 
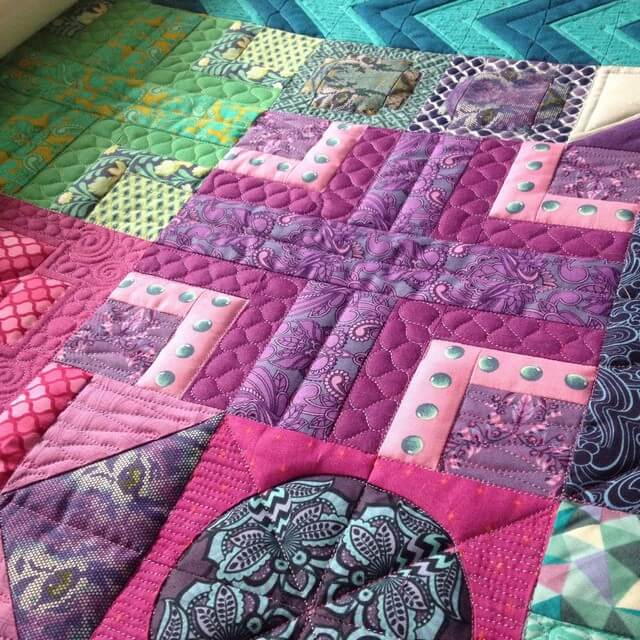
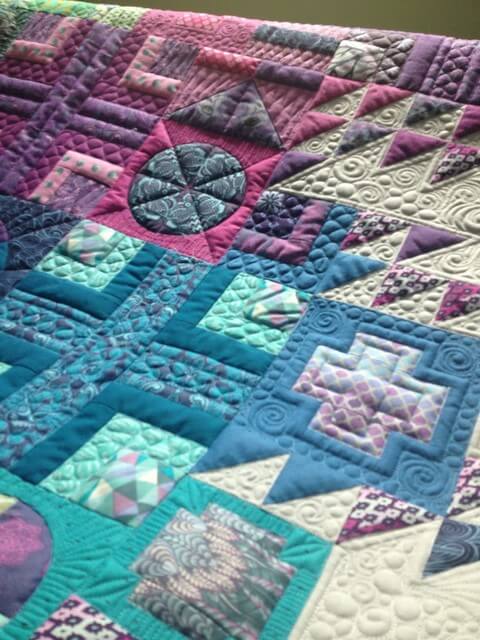
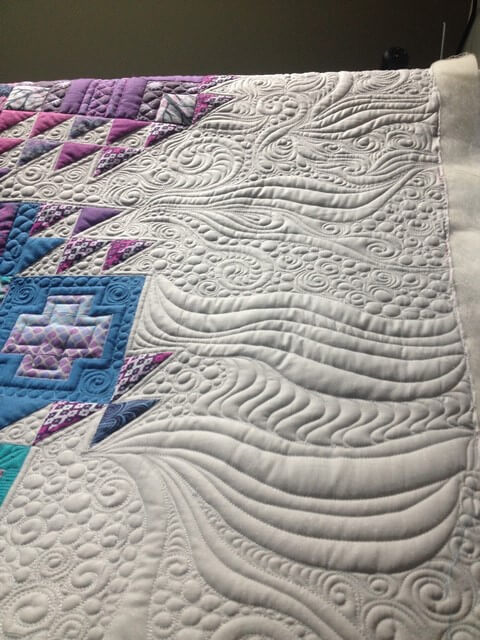
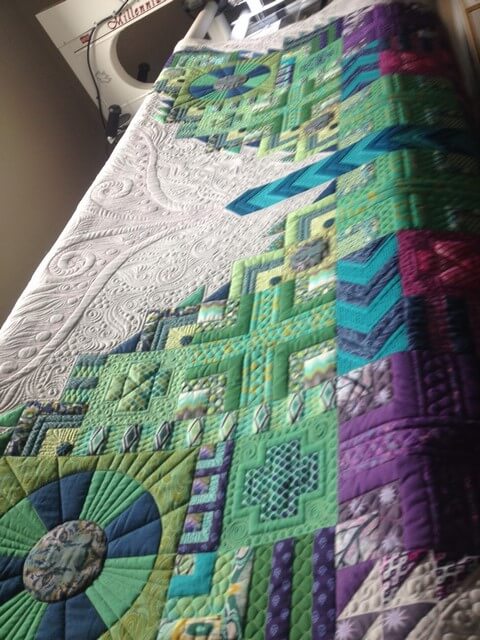
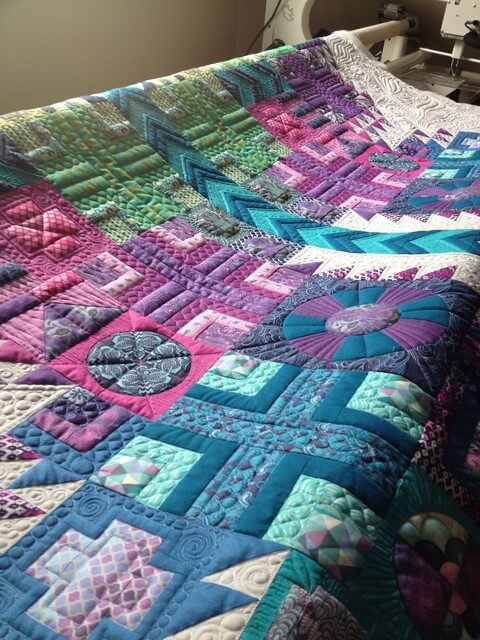
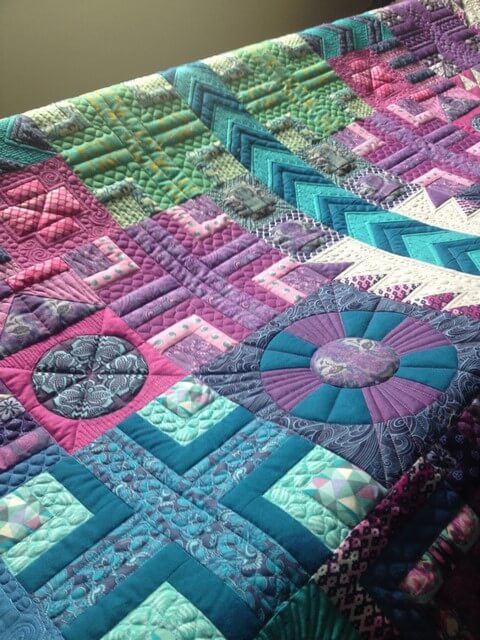
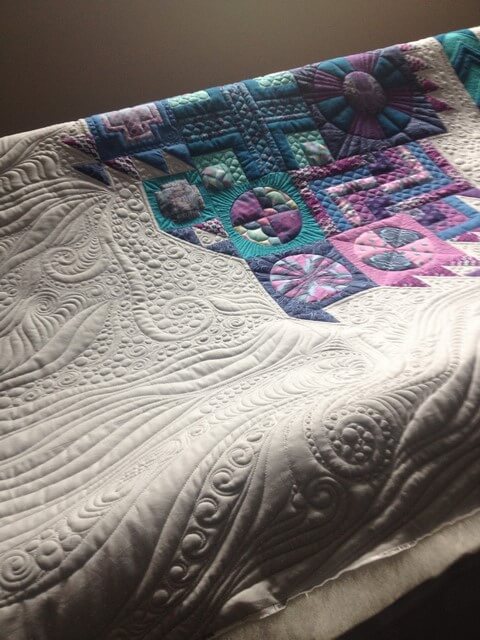
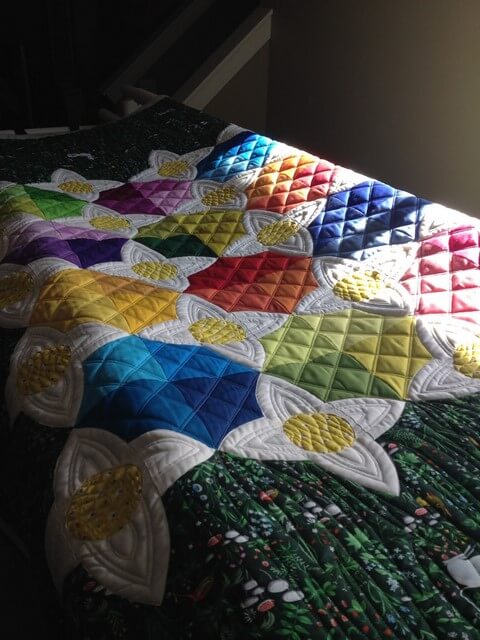
Next I stitched all of the figure 8 designs on the centre of the flowers - I alternated directions on each block.  I then went through and quilted the rainbow 'octagons'.  The double cross hatch was actually fairly simple after a few blocks as there were registration points to keep everything nice and even.   I colour matched the thread for each of these blocks....
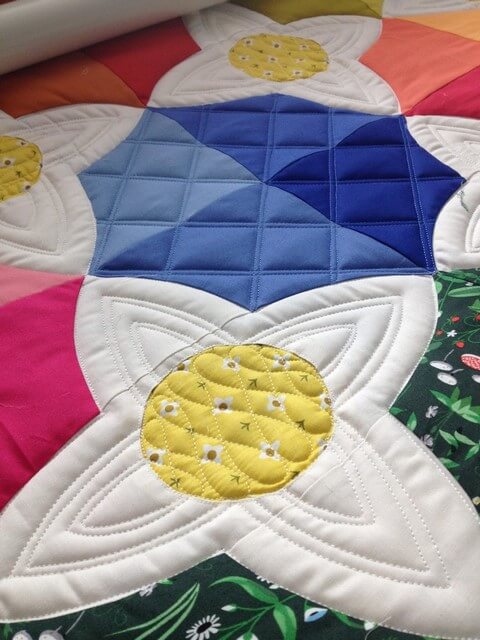
 Tip:  when doing the cross hatch - working from the bottom to the top or left to right (if possible)  is much easier for ruler registration lines....
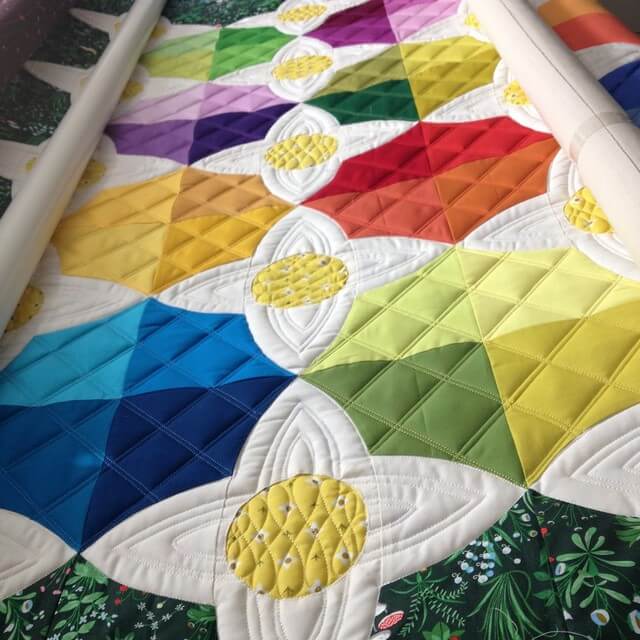
 Aren't the rainbows so pretty!  They look like gemstones!  

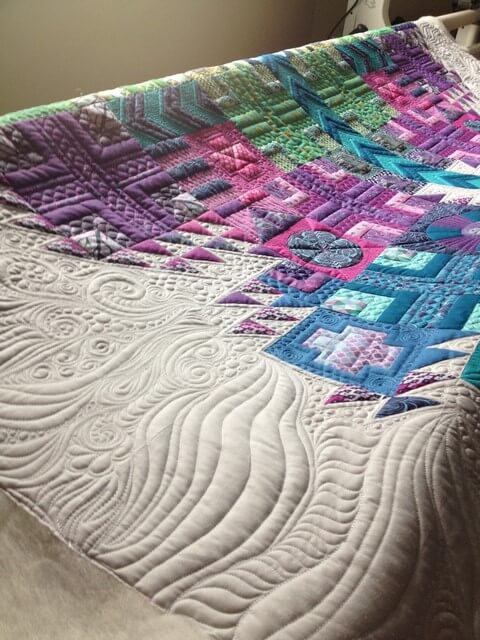
 The backing fabric is a double gauze cotton.   Double gauze is a thinner and looser weave than regular quilting cotton. It is GORGEOUS stuff and makes super soft quilts. Because it is a looser weave, I learned that it is a bit finicky, and by the nature of gravity - will just 'give' and loosen on its own when on the frame.  So I had a nice flat top, and a backing that was sagging due to the nature of the fabric.  A few of my longarm buddies gave me a tip to spritz the backing from underneath and use a hairdryer from under the frame to shrink it back into place.  A steam iron doesn't work upside down..trust me.  the water spills out all over you and the auto off feature kicks in. LOL    I just had to spritz and walk away for awhile, and that worked too.   I then pinned the areas a lot to make sure everything was even, and then quilted the grass....
 
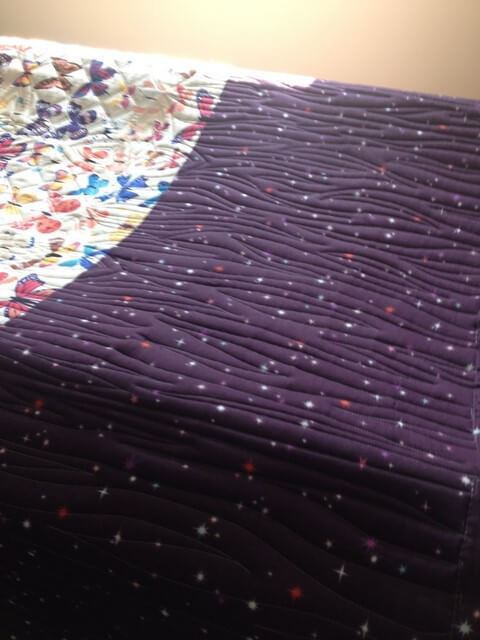
 I love how the waves lines of the grass show up on the backing! 
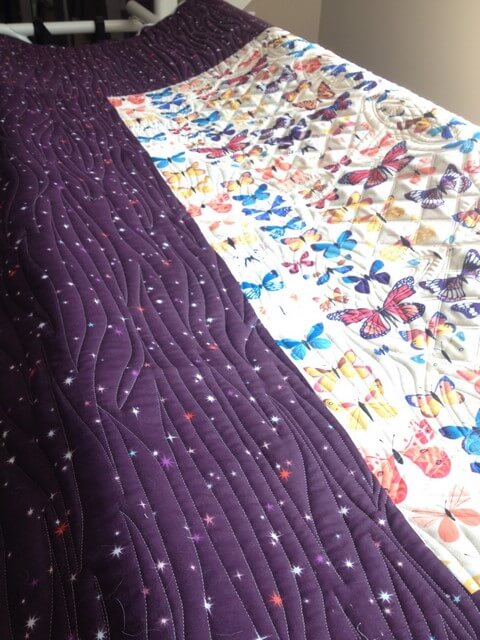
 The way the backing was pieced - I was able to centre it almost perfectly with the quilt top.   Pretty chuffed about that :-) 
 
 Details!
The Meadow Quilt - Lizzy House
Pieced by Erin F.
83'' x 95''
Superior Magnifico Thread on top,  Wonderfil Decobob thread in bobbin
Hobbs 100% heirloom wool
Hand guided quilting by me on my APQS machine

If you have any questions about this quilt or process always feel free to ask!   


Save Save

Thursday, July 14, 2016

The Tula Pink Butterfly Quilt - pic heavy

Dianne asked me to quilt this incredible Butterfly Quilt.   The pattern is by Tula Pink and it is called The Butterfly Quilt.   The piecing and the fussy cutting is exquisite and I knew I had to step up and really emphasize her work....

The first thing I did was go on the internet and do a ton of image searches of butterflies.  In nature,  in art, and  in tattoos.  Yes Tattoos.  I wanted to find the right idea for the white background of this quilt -  something that will incorporate swirls and movements and motion.   I found many images and just took elements from different ones that I thought I could use on the quilt-  tendrils, swirls and over the top antennae.   The antennae that I have seen on other quilts were small.   We wanted something larger and showy....  

After many sketches and ideas, I simplified and settled on this design -  I drew it out on my plexiglass, and then transferred it to the fabric with fabric marker.   
I then marked out a few swirls and tendrils at the wings and base of the butterfly -  all freehand.  And then loaded up the quilt on the frame.
I started with basic wavy lines.... 
 and then started work on the antennae.   I used a pink/purple variegated thread on the antennae to pop a little more.  
Follow with fill....and waves lines to gently transition to the outline of the butterfly....
Here is a front view of the antennae.  I love the dots I chose to quilt over those tendrils! 
Next came the beautiful piecing -  Dianne's fussy cut piecing was something I have never seen before.   The precision was very deliberate and therefore I knew I had to make my choice in quilting very deliberate.   I will let you scroll through the next photos, but be sure to click on them to enlarge and take a close look at the fussy cutting :-)  (details of thread, size, etc at bottom of post)
This is my favourite block....
Each block was stitched in the ditch, and then quilted to have a positive/negative pop with the piecing.

Blocks with similar piecing were quilted similarly...
These few blocks give you a good indication to the fussy cut piecing...
The body chevron pattern of the butterfly was quilted to show texture and dimension, again, stitch in the ditch first and then accent quilting.
Even the lighter teal colour in the body was fussy cut...tiny dots that were perfectly placed in the triangles.
The outside edge of the entire butterfly was outline quilted with a 1/4'' border.


The tendrils hanging from the base of the body...hard to see in the photo, but I tried to mimic ribbons flowing from the body...
 Details -  Tula Pink The Butterfly Quilt
89'' x 94''
Hobbs 100% Heirloom Wool Batting
Magnifico thread top assorted colours
Aurifil Aurilux purple variegated thread top (antennae and purples)
Wonderfil Decobob bobbin thread
Machine guided quilting on my APQS machine 
Piecer:  Dianne A. of Calgary, Alberta


The Tula Pink Butterfly Quilt - pic heavy

Dianne asked me to quilt this incredible Butterfly Quilt.   The pattern is by Tula Pink and it is called The Butterfly Quilt.   The piecing and the fussy cutting is exquisite and I knew I had to step up and really emphasize her work....

The first thing I did was go on the internet and do a ton of image searches of butterflies.  In nature,  in art, and  in tattoos.  Yes Tattoos.  I wanted to find the right idea for the white background of this quilt -  something that will incorporate swirls and movements and motion.   I found many images and just took elements from different ones that I thought I could use on the quilt-  tendrils, swirls and over the top antennae.   The antennae that I have seen on other quilts were small.   We wanted something larger and showy....  

After many sketches and ideas, I simplified and settled on this design -  I drew it out on my plexiglass, and then transferred it to the fabric with fabric marker.   
I then marked out a few swirls and tendrils at the wings and base of the butterfly -  all freehand.  And then loaded up the quilt on the frame.
I started with basic wavy lines.... 
 and then started work on the antennae.   I used a pink/purple variegated thread on the antennae to pop a little more.  
Follow with fill....and waves lines to gently transition to the outline of the butterfly....
Here is a front view of the antennae.  I love the dots I chose to quilt over those tendrils! 
Next came the beautiful piecing -  Dianne's fussy cut piecing was something I have never seen before.   The precision was very deliberate and therefore I knew I had to make my choice in quilting very deliberate.   I will let you scroll through the next photos, but be sure to click on them to enlarge and take a close look at the fussy cutting :-)  (details of thread, size, etc at bottom of post)


 Details -  Tula Pink The Butterfly Quilt
89'' x 94''
Hobbs 100% Heirloom Wool Batting
Magnifico thread top assorted colours
Aurifil Aurilux purple variegated thread top (antennae and purples)
Wonderfil Decobob bobbin thread
Machine guided quilting on my APQS machine 
Piecer:  Dianne A. of Calgary, Alberta