Monday, September 30, 2013

Machine Quilting 101- making meanders marvellous

**These ideas are for beginners who really need some ideas beyond the basic meander.  You do NOT need a longarm machine to do any of these designs!  In no way am I an expert, but I do have some ideas to share with you.  Take from it what you want, need. If you have ideas to share,  please do!

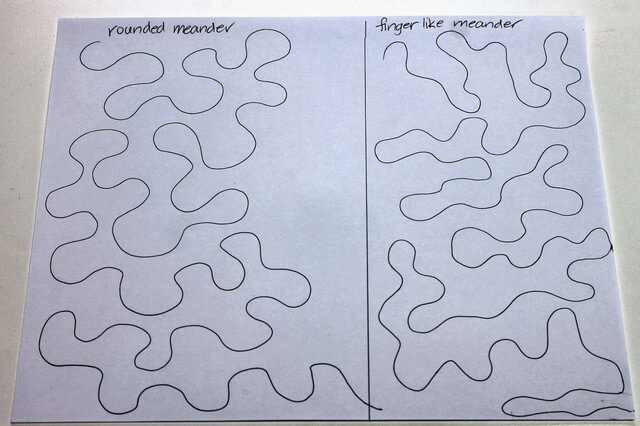
After you have become bored of your basic meander (and you probably already are!)  you can practice some variations of it such as the
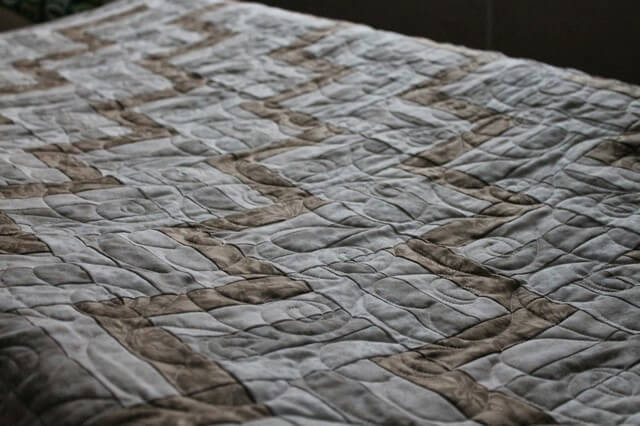
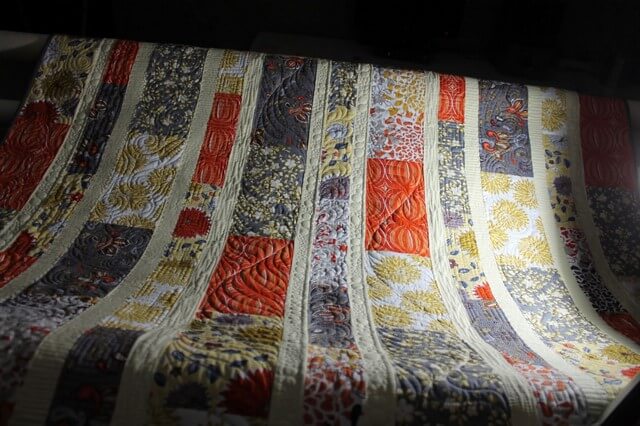
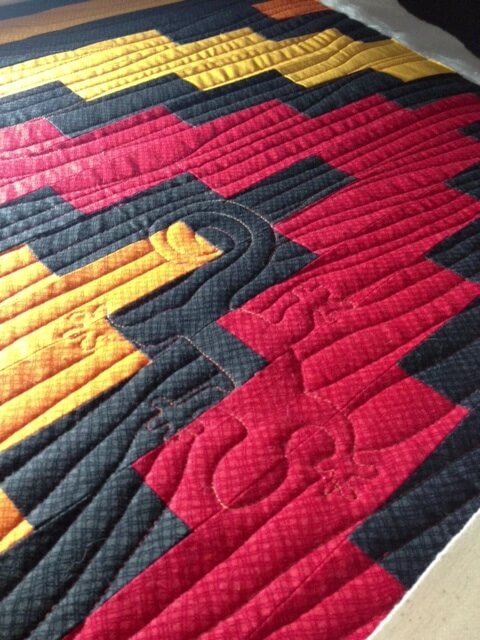
 watery meander .   It can look very modern and sleek on graphic quilts and you can scale it up and down depending on your quilt.   It can also be a great pattern to use for theme quilts: -  literally as 'water' background around a sea themed quilt, or around an element such as a fish or duck. I have also seen it used in spooky Halloween themed quilts - as a foggy background.  
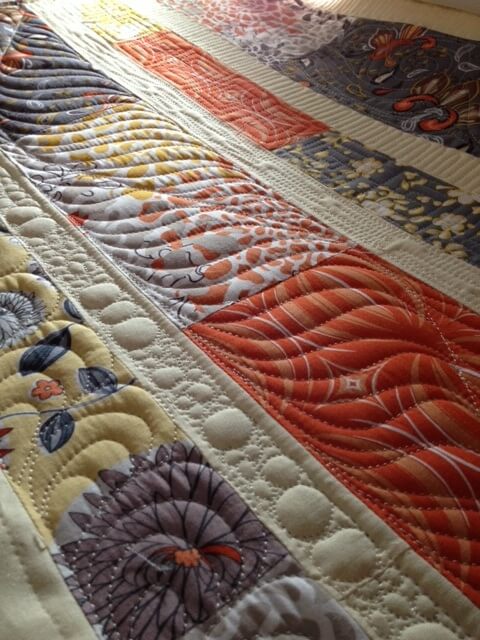
The watery meander can also be squared up and boxy - such as on the right side of this sample.  Also, don't limit yourself to one direction, try stitching it in a vertical direction as well!

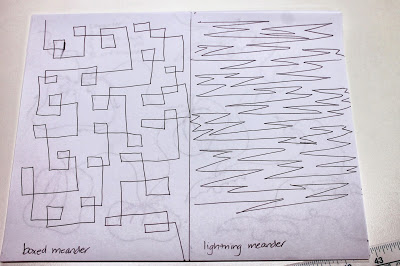
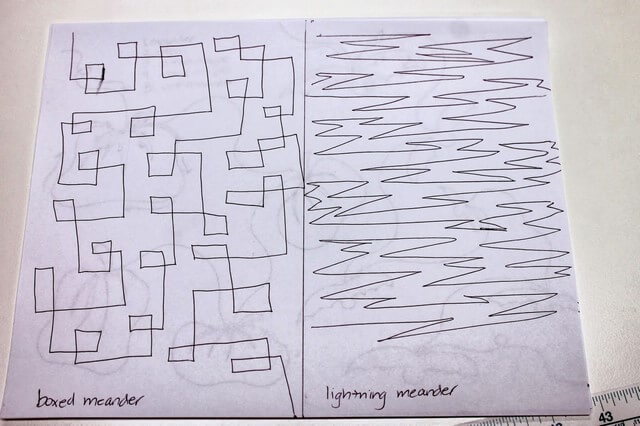
You can also take the watery meander and make it jagged such as in lightning or flames (above right)   

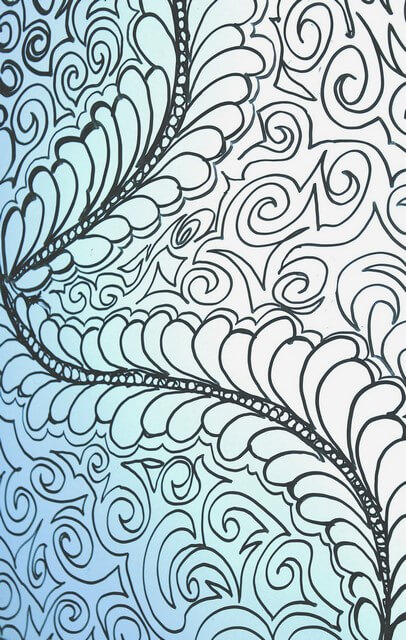
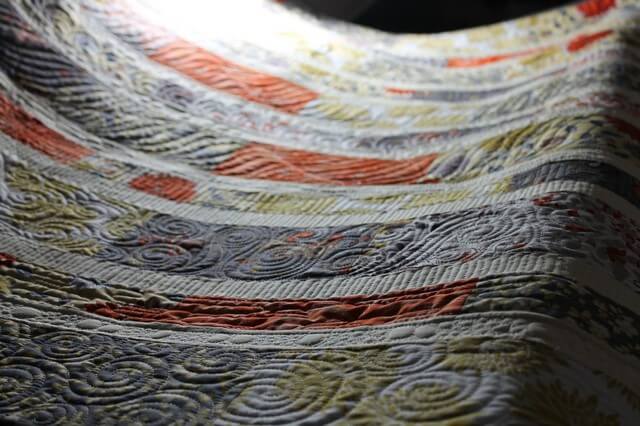
Another simple meander to practice is the loopy meander.   This one is so great because you can literally add any element to it to create a theme.  
First, you need to master traveling around an area without getting bunched up -  lots of even spacing, and working on your shapes.  Your loop can be oval or round -  and you can practice adding double loops too.   
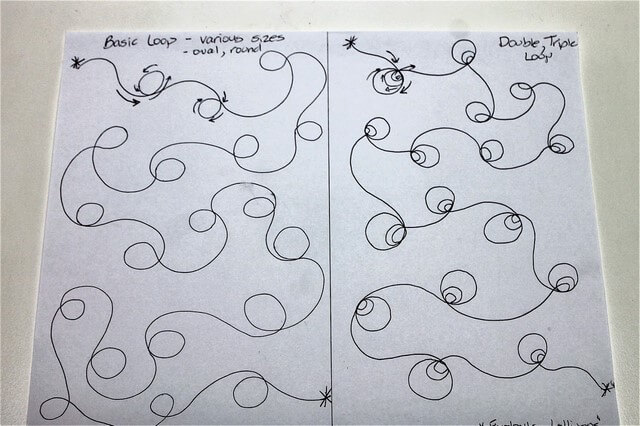
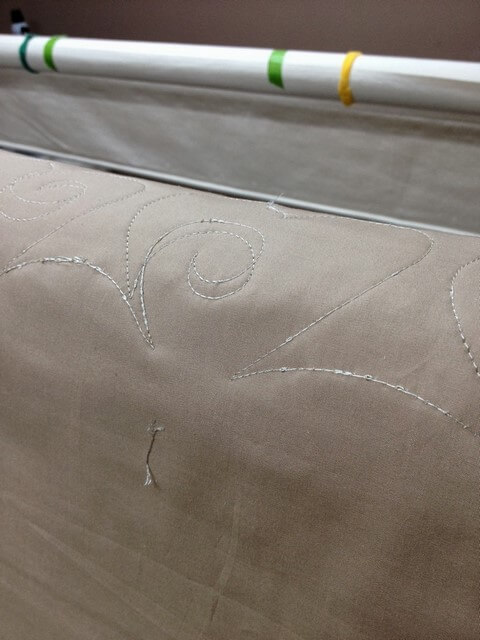
 I like to practice making my loops very round -  but ovals are good too because they be appear more delicate with leaves and flowers.

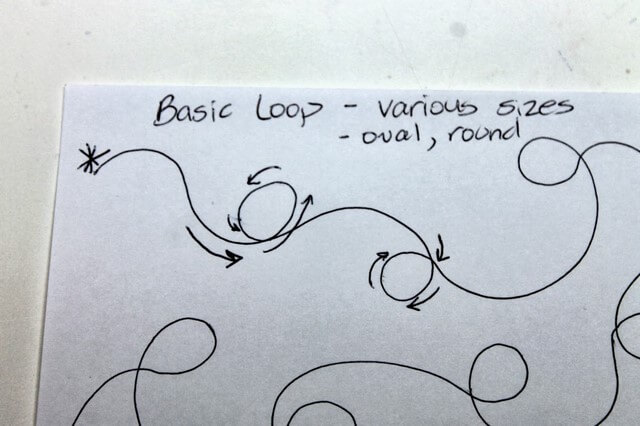
 When you travel making the meander,  your  first loop goes in one direction (counter clockwise) and then your next alternates direction (clockwise).  This helps to give some waves and motion to your meander.
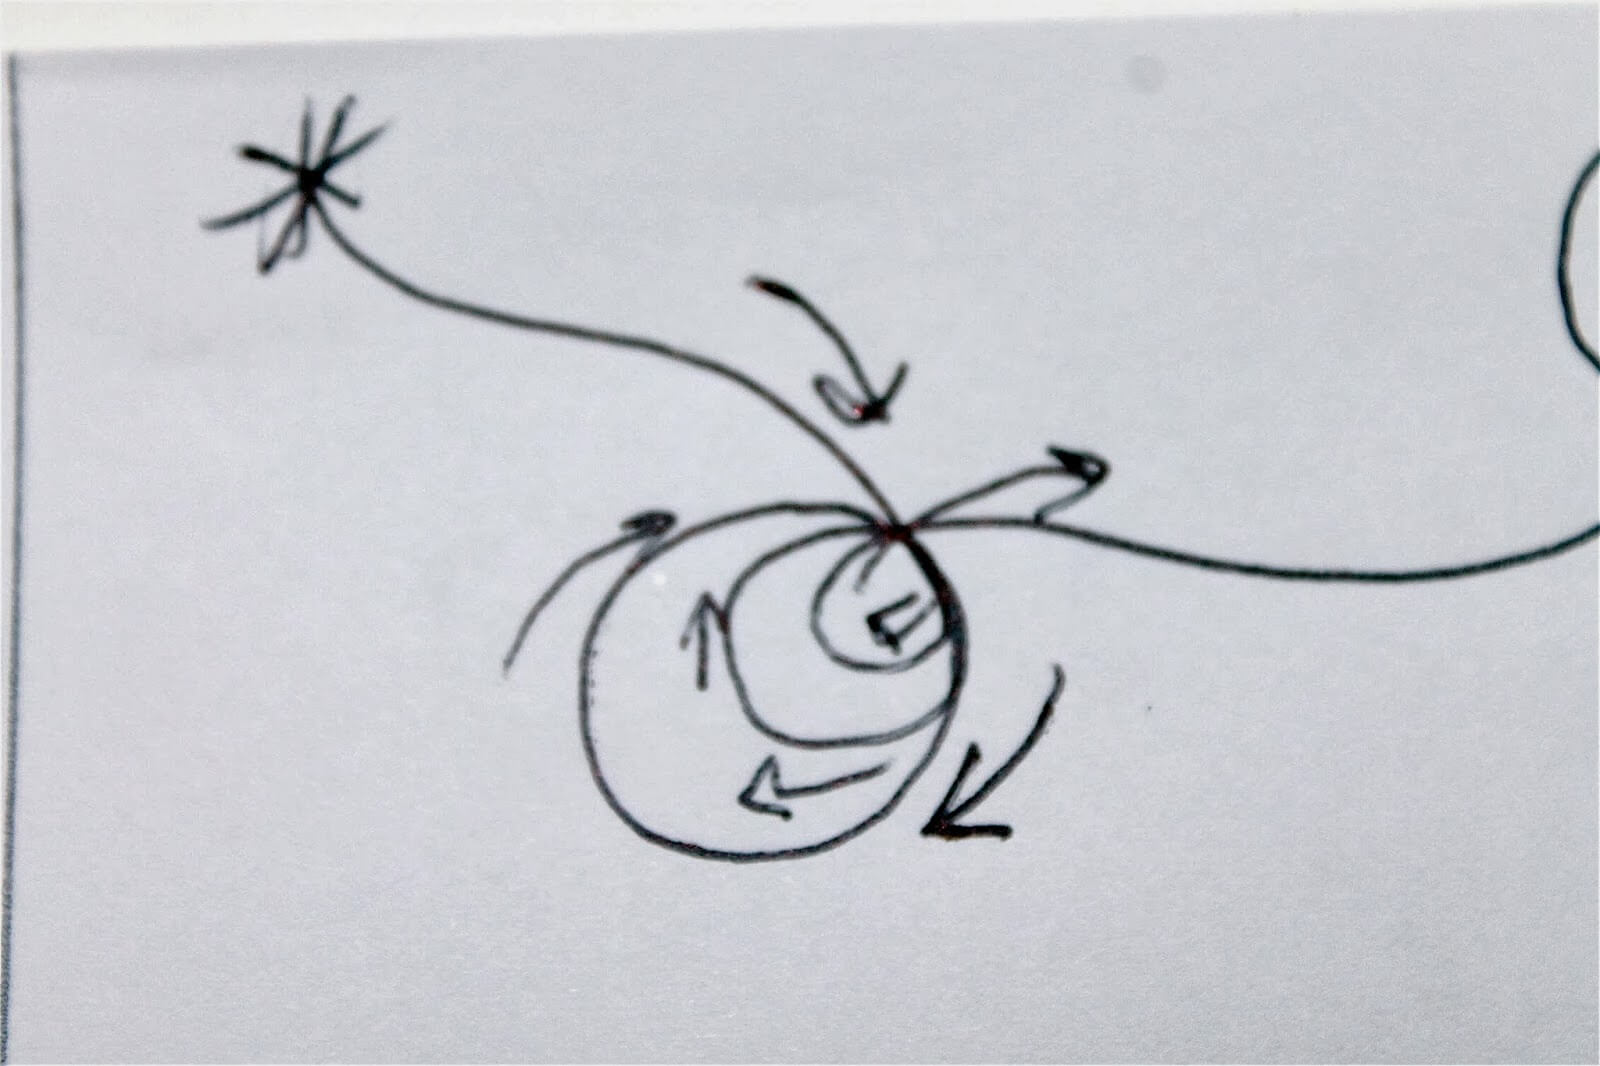
When you make a double and triple loop - make your larger loop first, and then the smaller ones inside. I'm sure you could do it the other way, but I find it easier to connect the loops without gaps and crossover. 
 Again, changing up the sizes (but being consistent throughout) and shapes in your loopy meander add interest to the overall quilting pattern.
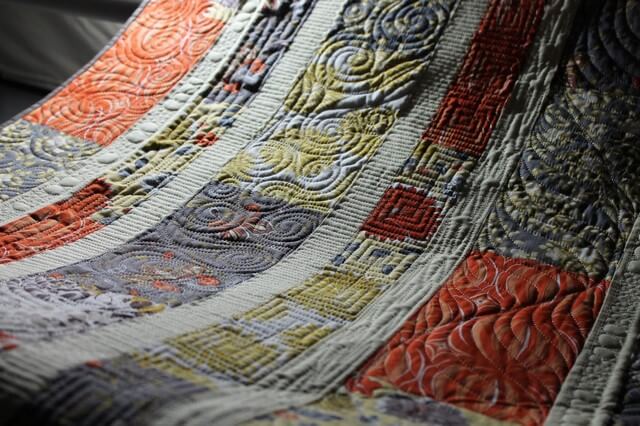
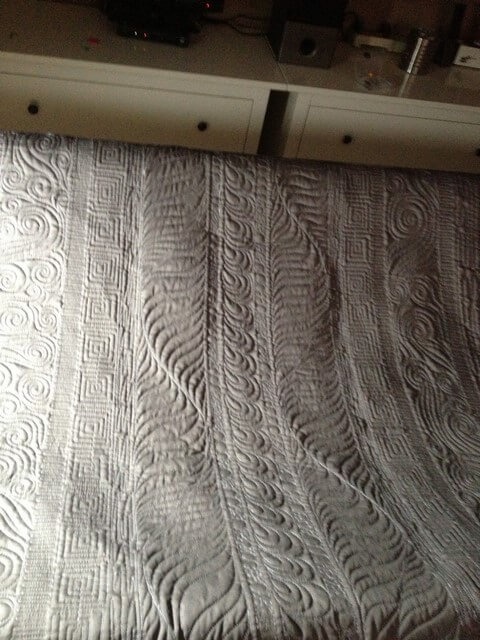
Another springboard from the loopy meander is the boxy geometric meander (above photo, left)
Instead of curves and loops, you use straight lines and boxes.

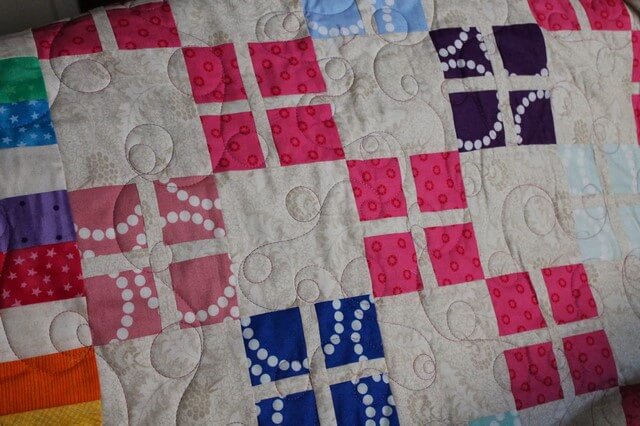
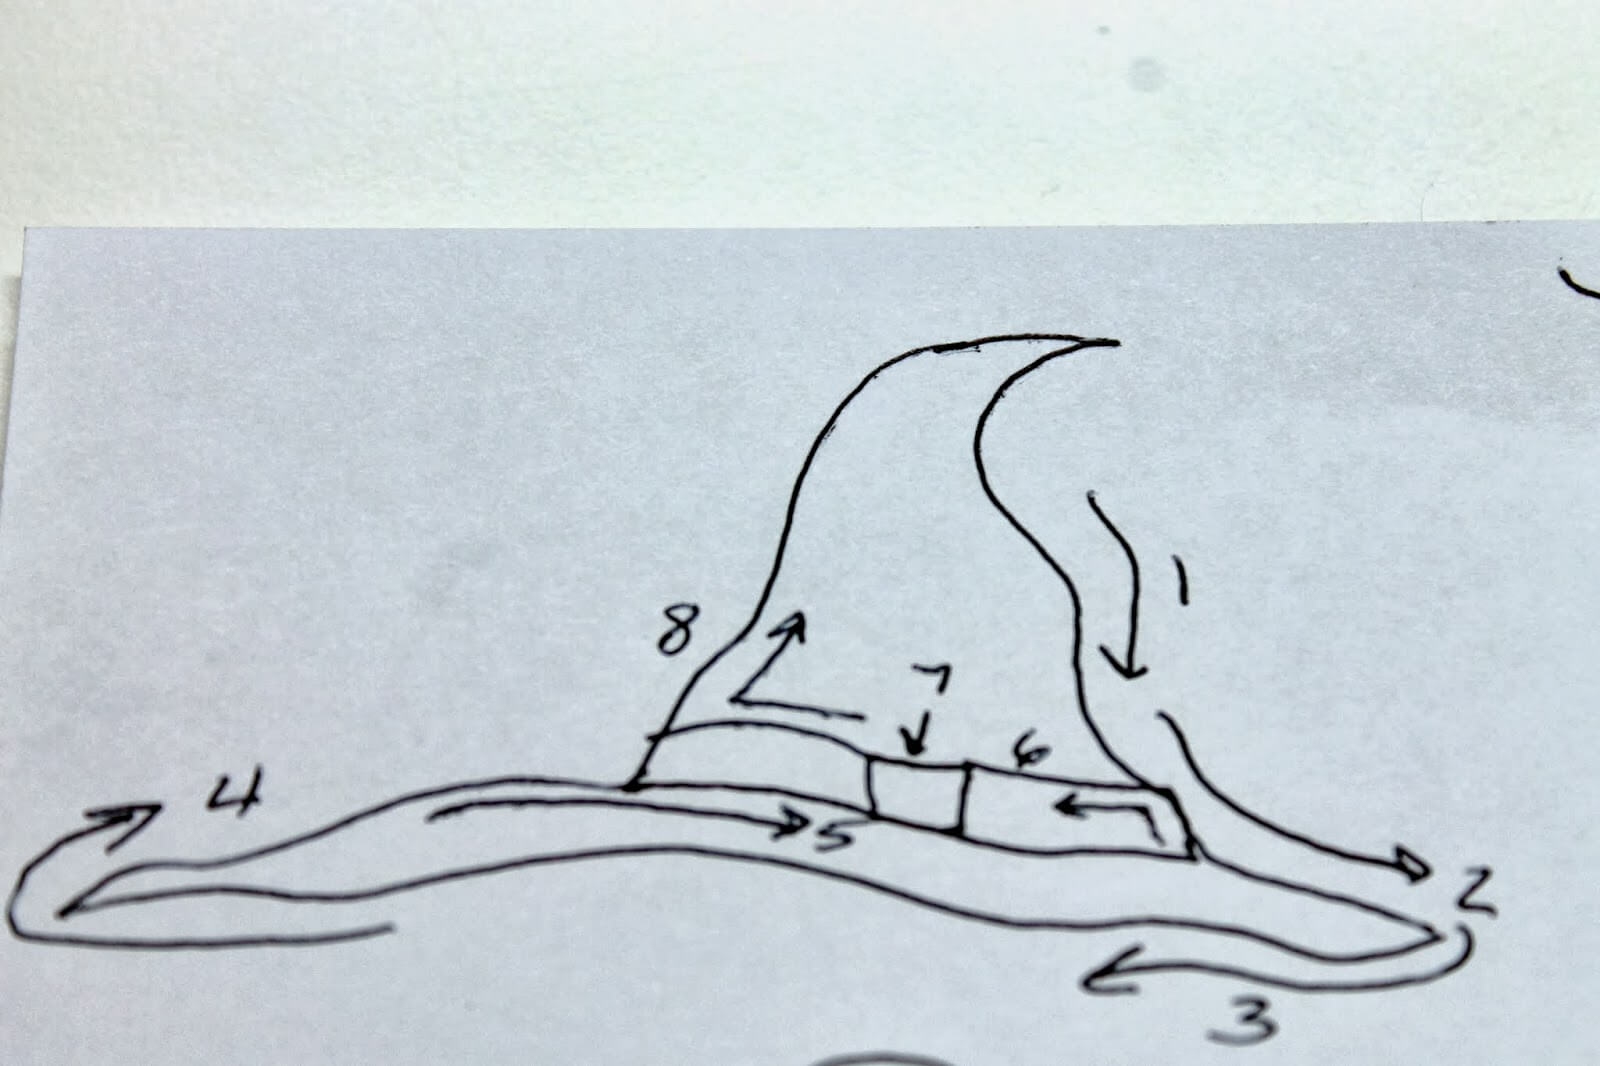
Once you've mastered loops and ovals with your loopy meander, you can substitute for actual shapes -  typical shapes include hearts, leaves, flowers, stars.   For Halloween coming up, I thought it would be neat to try pumpkins, crescent moons, bats, ghosts and even cobwebs! 

Meander just the same as the loopy meander but instead of a loop, you stitch into and out of your shape.
 The key to these shapes is finding a continuous line - no stops and starts.   I found plenty of images on google to mimic in my drawings (google images =halloween shapes, halloween stencils)
And hey!  Doesn't the double/triple loop almost look like eyeballs?  
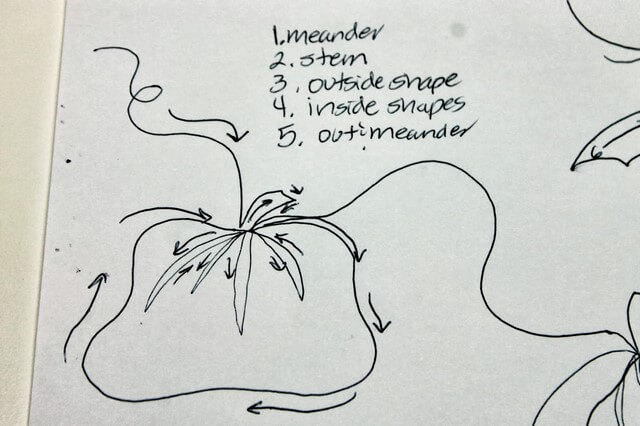
 pumpkins are great because you can vary the shapes and sizes

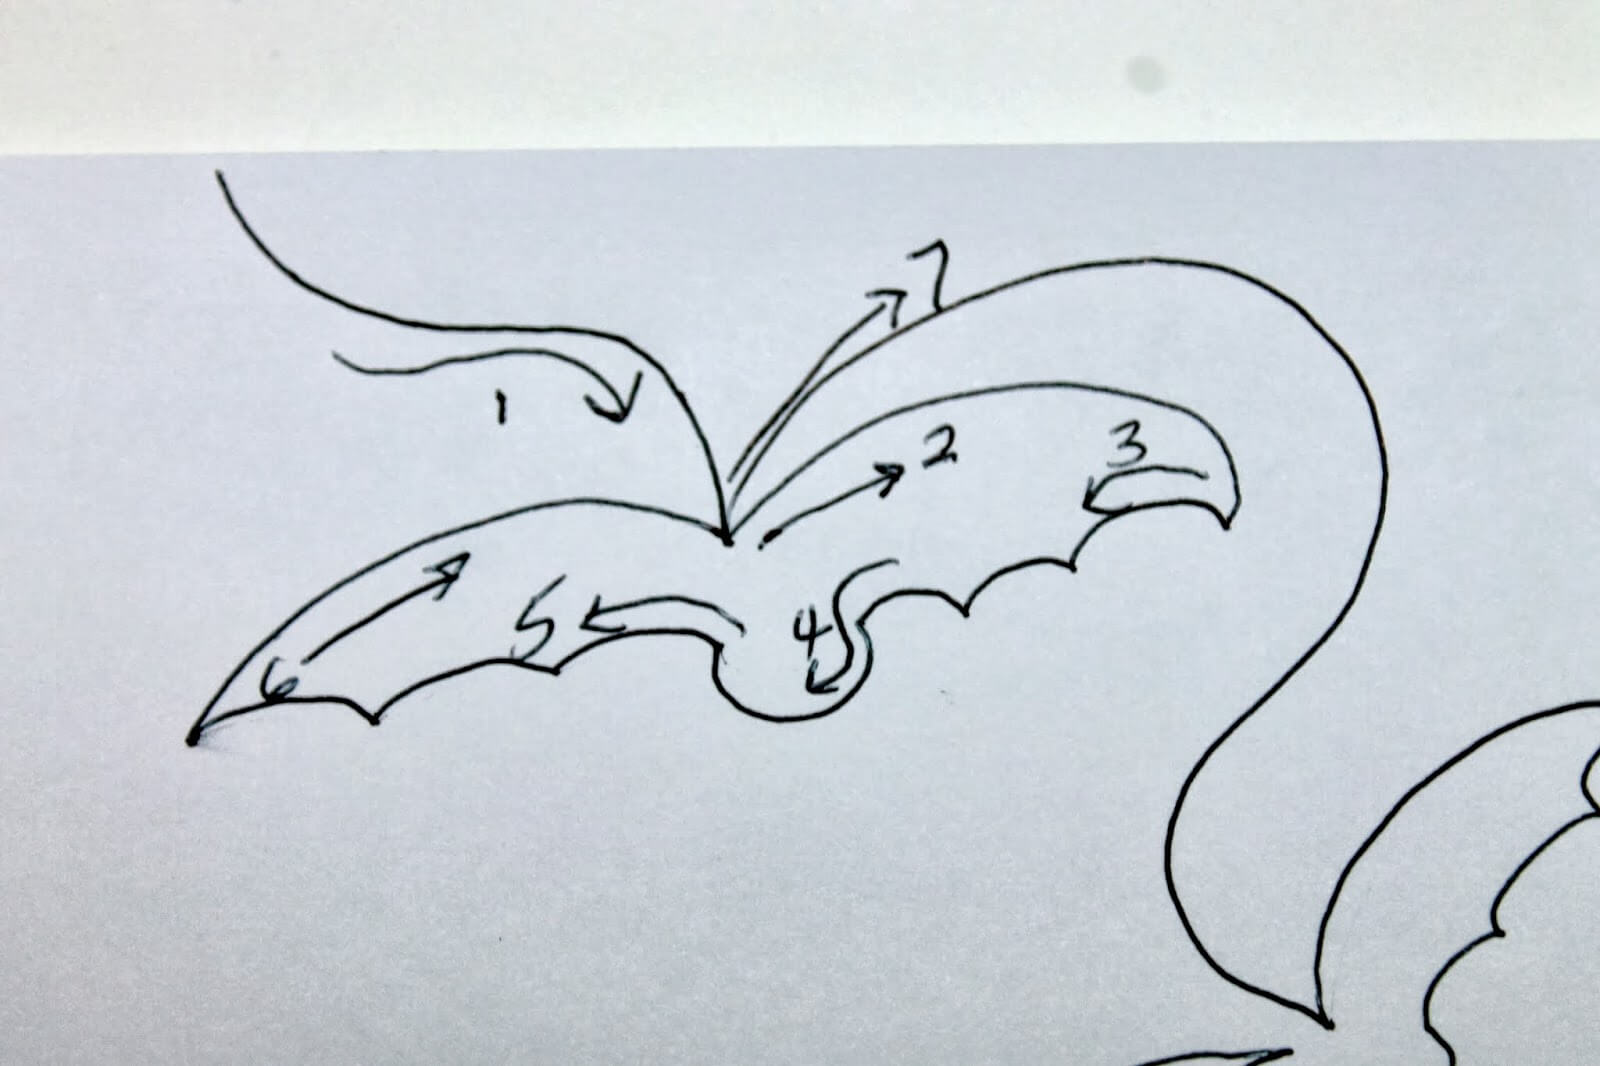
 Bats were pretty easy too -  remember to try and make your bats 'fly' in different directions, not just horizontally!
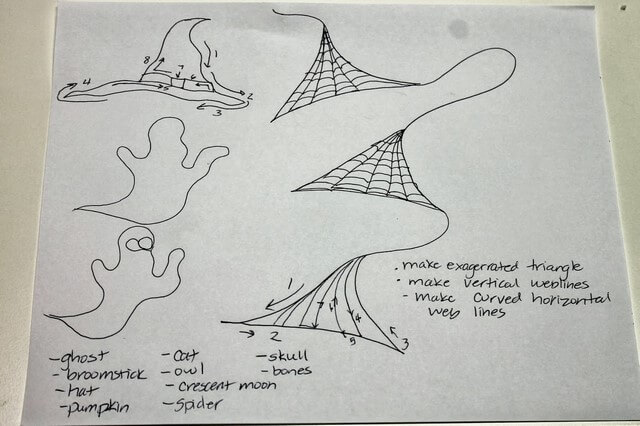
You can see here I found a way to make some cool spiderweb shapes too -  all one continuous line.  


Remember to PRACTICE PRACTICE PRACTICE PPP on paper or whiteboard first.  Practice until you are comfortable with it and then go to your machine.  Get the motion/flow of that shape into your memory first so that you aren't concentrating on the mechanics of making the shape, but making it a beautiful shape. 

So, there you have it -  the loopy meander.   Tons of options here and ways to take your machine quilting just a little more interesting than the basic meander.     Think about the themed quilts you have for Christmas - stars, bells, candy canes, garland, trees, cross -  shapes to change up that loopy meander and customize your quilt!

**tip - don't go too slowly - think of the speed as a smooth flowing dance.  Look ahead to where you are going, not where you currently are.  

Next up  -  what next?   simple textures, hooks, spirals and swirls -even feathers!
If you have any requests, leave a comment and I will be sure include your request in future posts.

Sunday, September 29, 2013

Machine Quilting 101 - an intro for beginners

I've been asked by a few people how to get started or improve their machine quilting skills, whether it be by longarm or just your standard domestic machine.

All I can say is practice, practice practice.  PPP.

 It really is like handwriting -  remember in grade 3 when your teacher taught you handwriting?   Did he/she give you the entire alphabet all at once?   No!  You practiced a couple of letters each day - with similar shapes at a time.  That is exactly how I work on my machine quilting skills.

lower case e's and l's are really good practice for loops in machine quilting!

Another thing to note -  you will never have the exact same swirls as Angela Walters or feathers as Claudia Pfeil.   They all have their distinct 'flavour' in their stitching, just as we all have our own distinct handwriting.   The goal is to get those shapes consistently looking nice and gaining confidence to try new ones!   

There are some basic shapes in machine quilting -   curves/arcs,  S shapes, hooks, straight lines, and loops.   From these basic shapes you can spring into more complicated ones.

I practice mostly using a whiteboard on my lap - while I'm watching TV, but I do use a notebook/sketchbook to practice as well.   Once I have the shape reasonably comfortable in my practice, then I move to the machine and practice there.


When I practice,  I focus on one particular shape or design that I am trying to master, until I get it into memory - or muscle memory as they call it.   Think of when you JUST learned how to form that letter 'a' in handwriting,  you really had to think of the steps of how to make that 'a'....and now years later (many many many many for me ) you don't even think of how to form it now.   That is muscle memory.   Luckily, your teacher had you mastering that 'a' within a few days or weeks, right?   It will happen in quilting for you, too.

So, I have listed a few easy machine patterns that I do to practice some of the easier shapes.  The easier the shape, the more I focus on things like changing size; travelling across the quilt without getting stuck in a corner; and filling the spaces evenly.   Believe it or not, I STILL go back and practice a plain ole meander once in awhile!

Curves and Arcs

The very first thing to do would be some simple S curves and arcs -  that would be the basic meander!
all of the names I call these practices are made up by me - there could be an actual name for them, but this is what I call them.

The Meander
Poor ole meander, it does not get enough credit.  This is the foundation of quilting - this is how we start out!   Practice making your curves nicely rounded (left of photo), and fill up your space evenly, without getting 'trapped' in a corner.  You can also try some variations such as one I call the finger like meander - the curves are longer and less round, the fingering meander has more stretched out peninsula like shapes

I'll continue with a few more in my next post...

Thursday, September 26, 2013

On Quilting Tension - a tip!

I'm quite fascinated at how a wee change can affect tension on my APQS quilting machine.  

Here is some experience I have gained with quilting tension.  Little tiny adjustments make HUGE differences.   On this quilt, I had two moments of 'railroad' tracks on my backing.  See how the thread kind of sits on top of the fabric, a bit of  looping, and the thread isn't sinking in?  


Here is one slight tweak that completely fixed the problem:   
See the 3 hole thread guide just above the tension dial?   
The position above is in the 7o'clock and 1 o'clock angle...this is how it should NOT look.

Here I tightened it back to 8 o'clock and 2 o'clock angle and the tension fixed itself.  Just that slight tweak gives a little more tension on the thread.  
check your machine manual for proper positioning -  this positioning is for APQS machines


Another issue I came across which makes me laugh at how trivial it seems, but makes a world of difference.   
When I use slippery thread (Glide, Magnifico, MasterQuilter, Aurifil Poly) it tends to spew off the cone faster than a cotton or a matte poly.  (Do you like my term spew?) 
 You can even see in the photo above, the thread just hanging there very loosely.   

If you stick a tiny wad of bating in the thread guide (loosely, just so that the thread doesn't escape) so that it has a bit of friction when going through,  the tension corrects itself.   
 I figured this out when I ran out of bobbin thread, the top thread often breaks.   Then, the wad of batting somehow pops out of the guide.   Not paying attention to this minor detail, I continued quilting and got poor tension (railroad stitches on the backing)  I realized the little wad was missing - popped it back in, and the tension was beautiful again.   

Silly details, right?


 Here are some things I've noted so far that affect tension:
-batik fabric
-quilt top or back too tight
-poor quality backing fabric 
-slippery thread
-poorly wound bobbins
-needle that needs to be changed
-needle that is not quite in the right position

When I get the time, I'll blog more about some tension tips and tricks for the newbie machine quilter.  Have a great day!

A first quilt..


Carol completed her first quilt, a rail fence, with these beautiful neutral colours.    I used the pantograph called Love Doodle, and it turned out beautifully.     I think we have another quilter blooming in our community!  She did a fabulous job, and I hope she is motivated to continue with more projects.


The original Love Doodle Pantograph that I had was a little small and too dense for this quilt.  I went to my local Staples and enlarged the pantograph sample to adjust the size.  The enlarged pantograph worked much better with the blocks, and was a softer effect.  
edited to add:   I contacted Urban Elementz regarding resizing the FREE pantographs that I had downloaded and there is no issue to size the free pantos on that site.     


Next up, is this quilt that has been waiting for about 3 years for some quilting:

Wednesday, September 18, 2013

Marmalade Grey Quilt

I am addicted to texture.
...and still trying to find the right way to photograph a quilt with texture.
This was an older quilt top I finished awhile back and never had the courage nor the skills to quilt it as I would like.    It's just a small one,  a pattern I made up on my own. 
I call her marmalade grey...because marmalade has all of those chunky bits in it to give it texture...
 
 There really wasn't much of a plan,  I just wanted to do something that had symmetry and a lot of texture in it.   I especially wanted those little yellow sashings to sing. 

A note:  I used a 100% cotton sheet from Ikea for the backing.  Like I had read and had been warned about...tension on the back is sometimes an issue with sheets because of the tight weave.  I did experience this, but wouldn't completely stay away from doing it again either. 


Monday, September 09, 2013

Modern line designs...

practicing on a quilt top...

It's been awhile.  sigh.  

I have been enjoying summer with my family.   That's all.     

And quilting like a madwoman for the charity Quilting for Calgary - flood quilts.  So far, the count of approximately 1300 completed quilts are sitting in the warehouse awaiting distribution this weekend.  How totally incredible!!

Now that we're back to September and routine...I am too.  


adding geckos to a gorgeous Southwest inspired quilt by Sheila.